Introduction
Continuing the trend of "old-school" field methods from last week, this week we took a look at the basics of orienteering using only a map and a compass. These skills are the foundation of any type of physical geography techniques and are extremely helpful when modern technology cannot be used. Al Wiberg from the Environmental Adventure Center at UWEC visited our lab to give us a workshop on the basics of orienteering. The goal of the workshop was to prepare us for a future class activity in which we will be navigating to various points at the Priory, an annexed housing property of UWEC. The study area contains rough terrain and many obstacles, making learning the basic skills of orienteering extremely important. The first portion of this exercise included finding our pace count, learning how to operate a compass, and creating a topographic map in order to navigate the course at the Priory.
Methods
Pace Count
In order to find your pace count, you simply walk straight for 100 meters, keeping every stride consistent in length. This pace should be comfortable and repeatable in the field in order to measure distance accurately. While walking the 100 meter distance, count each step with the same foot, not both feet. For example, I only counted the steps with my left foot and I counted a total of 66 strides for the 100 meter distance. Most pace counts are found in the mid to high 60's, with taller people needing less paces and shorter people needing more. It is recommended to measure your pace count multiple times in order to acquire the most accurate rate. This pace count will be used in the field in conjunction with the map scale bar in order to keep track of the distance traveled, which is crucial information while traversing through terrain with only a map and compass. Al taught us to hold a small twig and break off a piece each time you reached 100 meters according to your pace count. If there is ever confusion about how far you traveled, simply count the pieces of twig that you have in your pocket and the distance can be estimated from there.
Compass Basics
Once the pace count was calculated, the next step was to learn how to navigate with one of our resources, the compass. The terms used in the following instructions can be found on Figure 1. The first step in using a compass for navigation is understanding the starting point and the destination. It is useful to draw a line using the straightedge of the compass to connect the two locations. Once the line is drawn, place the center of the dial on top of the starting point and rotate the entire device so that the direction of travel arrow faces the destination and sits directly on top of the drawn line. Next, rotate the rotating housing to face true north. Meridian lines on the housing and the map grid should help to align the orienting arrow to face North (at this point magnetic declination should be taken into account, but to due Eau Claire's location declination isn't a significant issue). Examine the azimuth degree values along the rotating housing and find the value that lines up with the direction of travel arrow. This will give you the azimuth bearing to your destination. To navigate from the starting point to the destination, simply keep the magnetic needle inside the orienting arrow (red shed) and begin walking in the direction of travel.
 |
| Figure 1. A compass has many measurements and components to help travelers navigate to their destination with ease. |
Map with Grid System
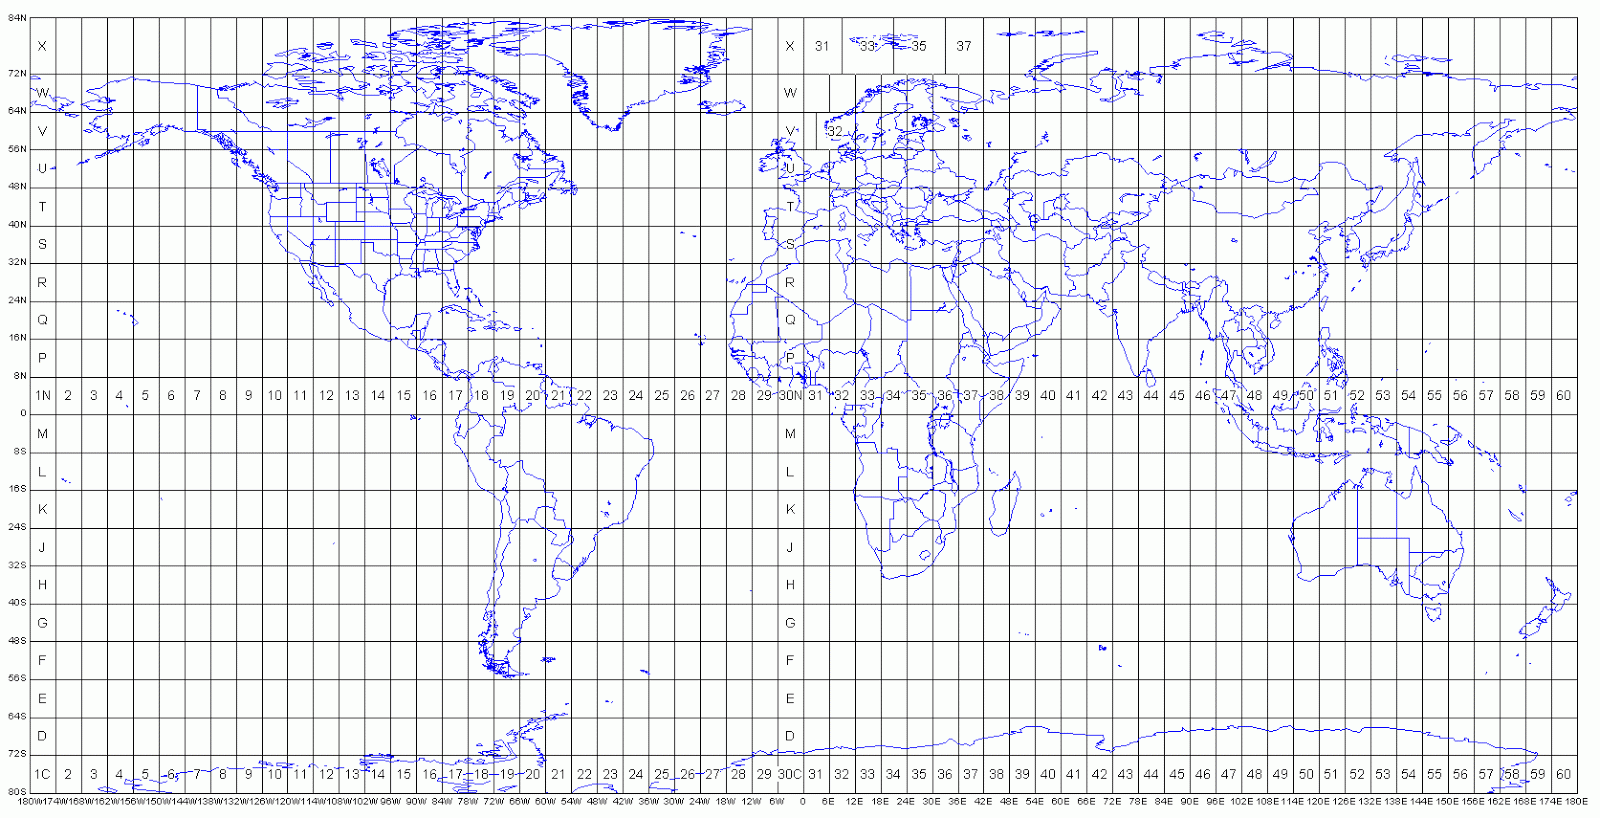
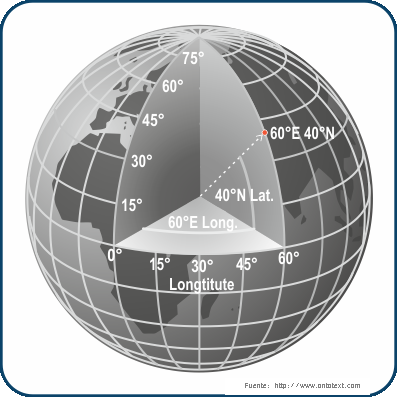
To properly navigate the terrain, a map is the second resource we will be using in the field. It is important that the map includes the entire study area but also includes enough detail at the same time. Since most of the landscape looks like a forest, it is important to include elevation contour lines in order to find the differences in the terrain while we are on the ground. Once the contour lines were placed on top of an aerial image of the study area, the final component to include were the grid lines. Two maps were created for the exercise, one map measuring location using the Universal Transverse Mercator (UTM) System, and the other using decimal degrees. The UTM system uses a 2-dimensional coordinate system to give locations on the surface of the Earth according to meridians created by 60 zones around the planet (Figure 2.). Decimal degrees express latitude and longitude as decimal fractions instead of degrees, minutes, and seconds. Positive latitudes are north of the equator while positive longitudes are east of the Prime Meridian (Figure 3.).
 |
| Figure 2. The planet is divided into 60 vertical zones within the UTM system. Eau Claire is located in the northern section of UTM zone 15. |
 |
| Figure 3. In the decimal degrees system, coordinates are written as decimal values instead of using degrees, minutes, and seconds. The decimal degree location of Eau Claire is (44.8167 N, 91.5000 W). |
Results
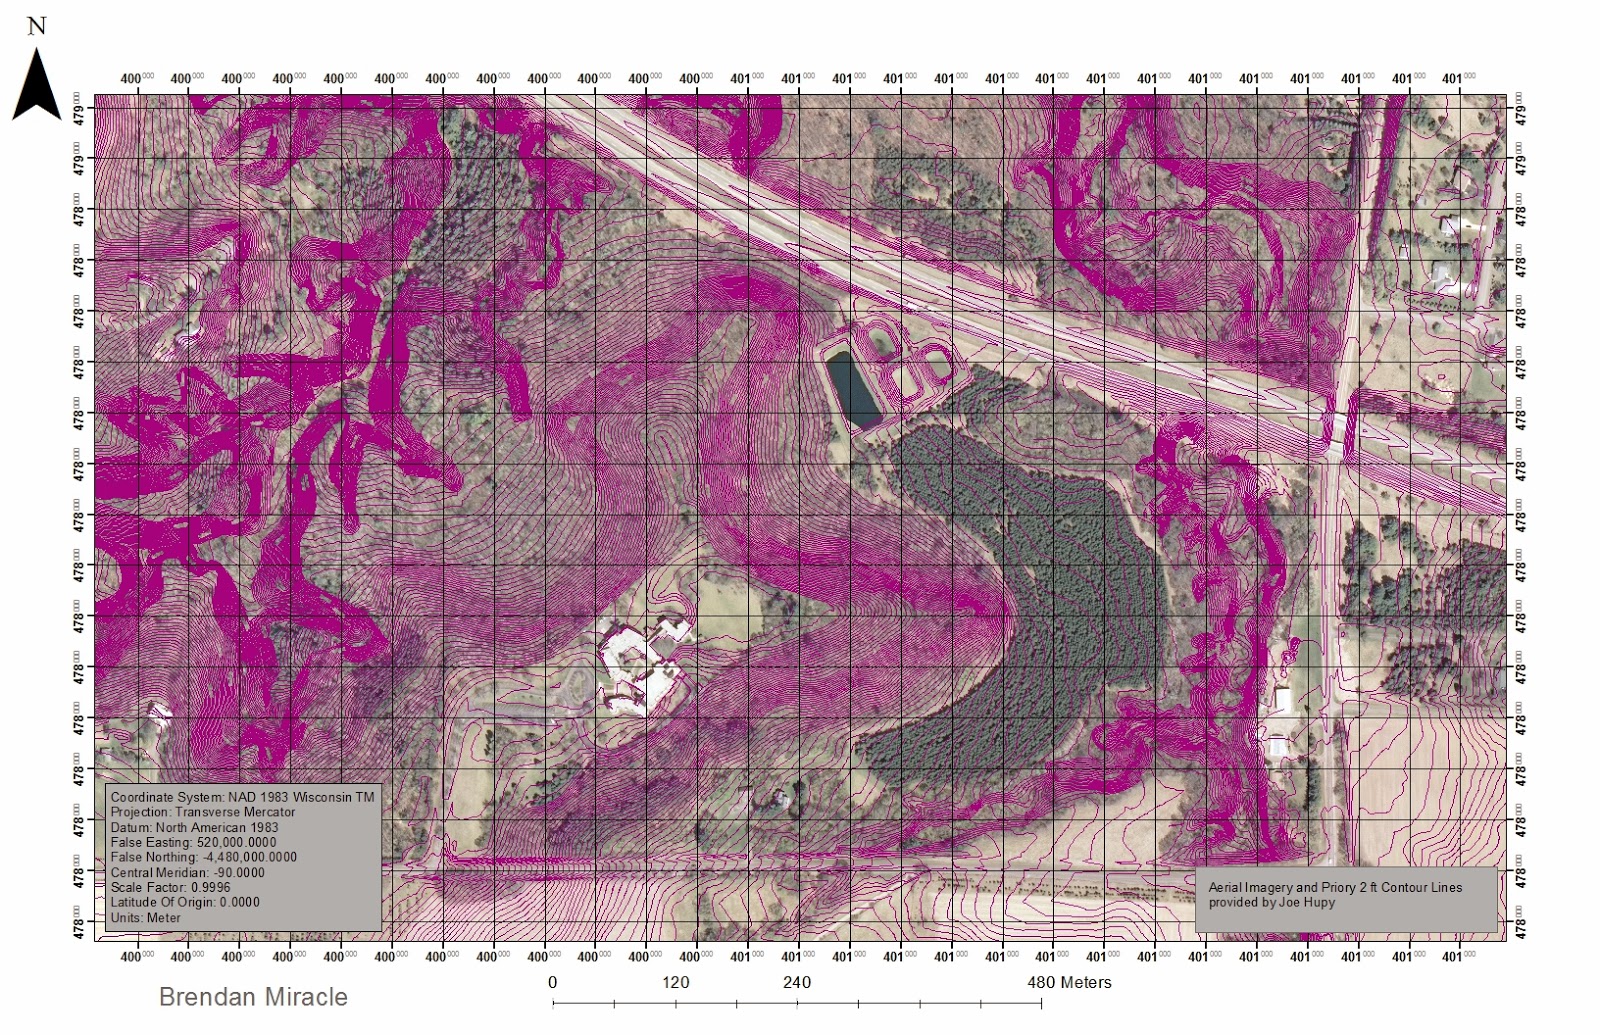
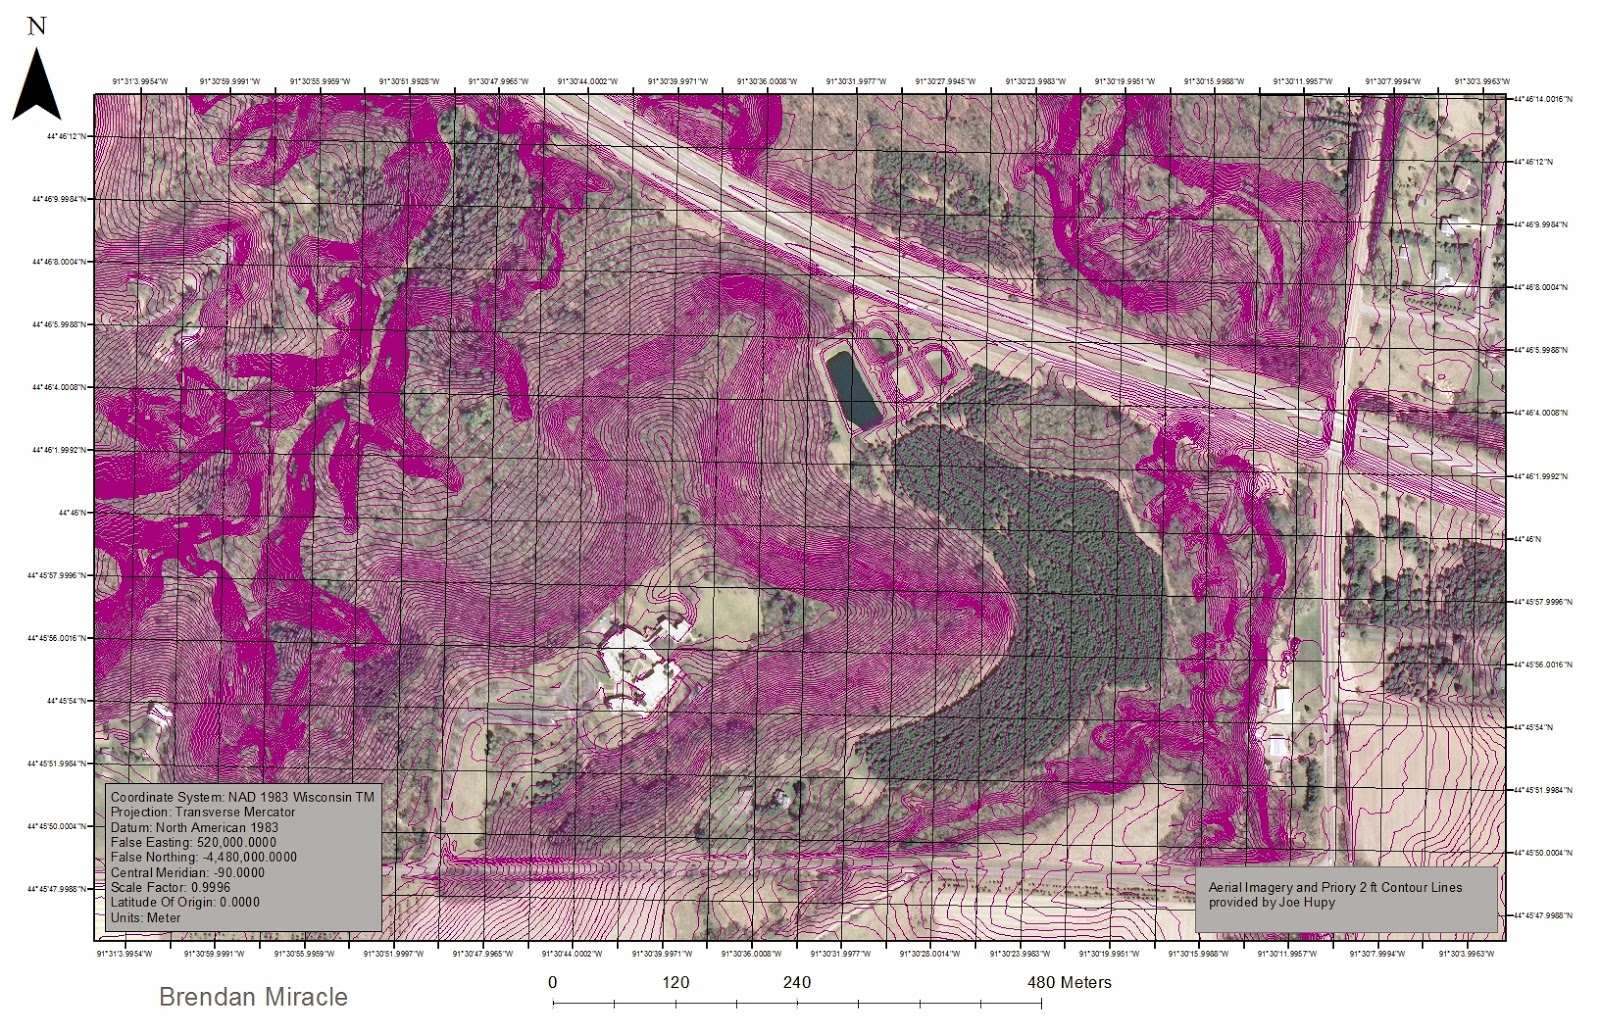
The maps created for the navigational exercise look identical besides the grid system that is being placed above the surface data. Figure 4 is the map containing the UTM grid and Figure 5 contains the decimal degrees system. The 2 foot contour lines were colored bright pink in order to distinguish them from the dark basemap and grid lines.
 |
| Figure 4. This map displays the Priory area with 2 foot contour lines under a UTM grid. |
 |
| Figure 5. This map displays the Priory area with 2 foot contour lines under a decimal degrees grid. |
No comments:
Post a Comment